MC Escher Jigsaw Puzzle and Origamic Architecture Reconstruction
I've been a big fan of M.C. Escher's Art since I was a little kid. His impossible figures drawings are mindblowing and his tesselations are fantastic. In the last couple of months, I've actually done a couple of projects that involve his work.
The first I did on Thanksgiving break. I had become very interested in making jigsaw puzzles on my scroll saw and after doing a couple of interesting puzzles that I made by printing pictures I found online and gluing them to the piece to be cut, I decided that Escher's tesselations would make fantastic puzzles. The one I settled on making is called Mosaic II and is a very interesting piece that is made from 40 different animals that fit perfectly together. It is colored in such a way that dark pieces and light pieces only touch the other at "corners." For my version this isn't quite true because I left out the tongue of the snake because I didn't want it to be easy to break. It's a fun puzzle that takes people between a half hour and an hour if they have no prior knowledge of what the picture looks like.
The original Escher:
Initial outline cut on my scroll saw (The whole piece is about the size of a 8.5 x 11 sheet of paper):
Well I've never tried wood burning before...but hey it looks like fun. I used wood burning tips on my soldering iron.
A few hours later!
Even later....Wood burning is finished!
The Finished Product after about sanding, staining, and coating with polyeurethane. The total project was about 10 hours worth of work:
The second project I did in the morning of one of my days off during Christmas break. It's a paper version of Escher's Relativity that is cut and folded out of one piece of paper and stays together using only tabs and no glue. The technique is called Origamic Architecture and at some point I will probably put up a post on all the different pieces I've copied using this technique. I found the diagram for Relativity on a flikr and you can download it here. Note: my version is mirrored from both what the diagram suggests and the original Escher piece. I "decided" to fold it the other direction.
The original Escher drawing:
The piece I made by downloading the diagram, printing it on a piece of paper, and then cutting and folding as indicated.
What Escher's would look like if it was mirrored like mine:
3D fractals cut on a scroll saw
This post is going to be on 3D fractals cut on a scroll saw. (Thus the title of course.) As some of you know, I'm somewhat addicted to making fractals, so it should be no surprise that a simple technique I learned ended up leading me to produce wooden fractals. Check out the paper craft fractals I've made here, and the worlds largest fractal made out of tortilla chips here,
To start this post, I'll put a couple of quick picture of the types of objects you can achieve with this technique, then I'll tell the whole story of how I started making them, and give a couple of tips, ideas and diagrams for people that want to try making them.
Quick Preview:
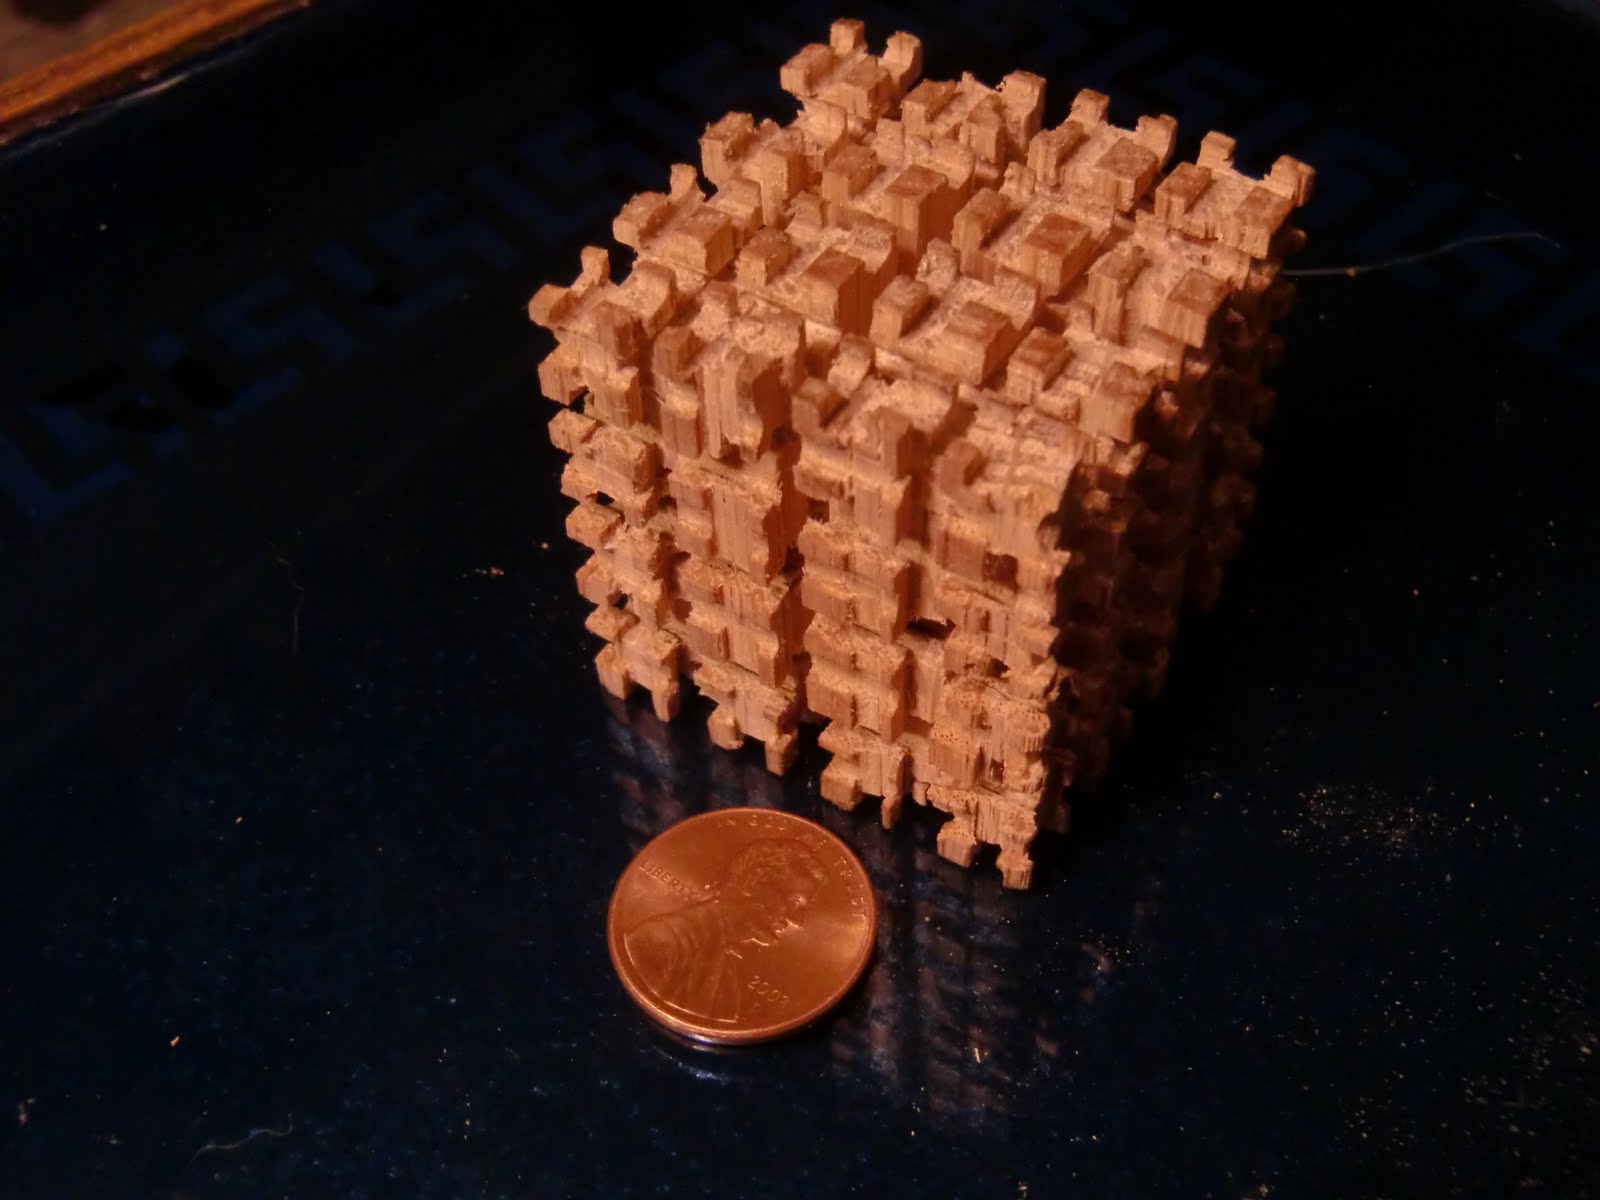


Over winter break, I've spent a lot of time using my scroll saw. I started out making Christmas Ornaments; I actually cut 10 different kinds of fretwork ornaments that I found diagrams for on the internet or in various scroll saw books and gave them as presents to all of my family. I probably made about 50 wooden ornaments in total by cutting up to 6 copies at a time.
Here's a small sample of the ornaments I made:
I also decided to try compound cutting 3 dimensional ornaments. This is standard scroll saw technique in which you cut on 2 different faces in order to produce a result. Here are pictures of the two that I made.
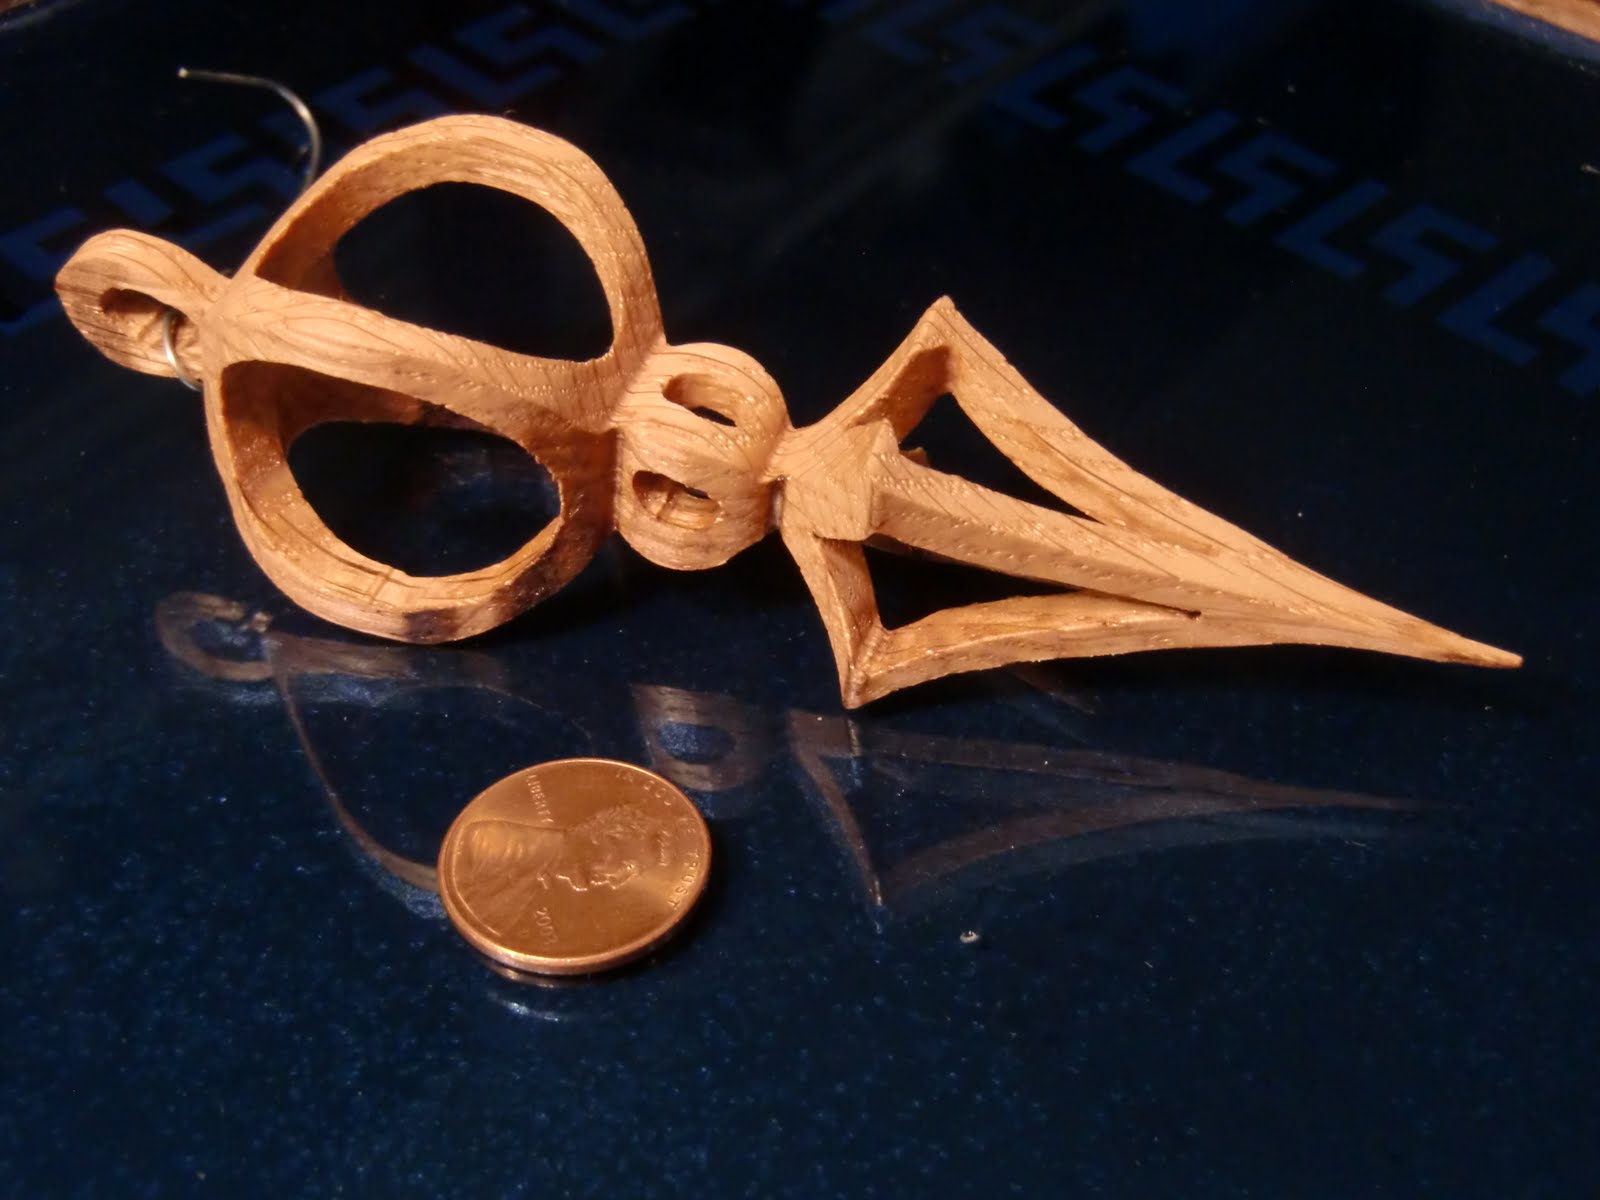
After cutting these compound ornaments out, I realized something. I was cutting out 4 different curves by only cutting two curves on each face. 2x2=4 of course... so why not try cutting 3 different curves on each face. This would give 3x3=9 curves. Hmmm... seems like exponential growth that could lead to an efficient method to produce fractal objects. So I started out trying to see what would happen if I cut out T-Square fractals on each of the 3 faces of a 1.5 inch cube that I made by taking a 2x2x48 Oak turning square (remember 2 inches is only 1.5 inches when you're buying most lumber). First I used the 2nd iteration of the T-Square which ends up getting you a cube, with 8 cubes at each corner, and then 7 cubes at each corner of those cubes for a total of 56 little cubes. This would take forever to carve by hand but probably less than an hour to cut using this scroll saw technique. I made the template by taking images from Wikipedia.
Here's a picture:
This one is looking at it so you only see one face letting you see what the diagram to cut it from would look like:
And here is the diagram it was cut from (You would fold along the red lines after scaling this to 3 inches by 3 inches) :
I needed to try to see if I could do iteration 3. This would mean that there would be 7 little cubes on each of the 56 small cubes from iteration 2 for a total of 392 really tiny cubes, some of which are fairly deep down in the structure. I failed on my first try, but succeeded on my second.
Here it is:
From there I decided to try a few ideas.
Here's a 3rd iteration Sierpinski square pyramid made by cutting 3rd iteration Sierpinski's triangles on 2 faces:
Here's a 2nd iteration Moore curve made by cutting 3 different faces using cross sections found from looking at pictures of a 3D Moore curve on Wolfram's mathworld site. Note to make this one you still have to cut a few pieces (10) by hand. But you get over 90% of the work done in an hour with the scroll saw. This is a really cool object. It is one continuous path connecting up the entire cube; a space filling curve.
Here's a fractal I made by making my own fractal tree and cutting it on two faces. Here it is looking at one face:
Now seeing it from a 45 degree angle: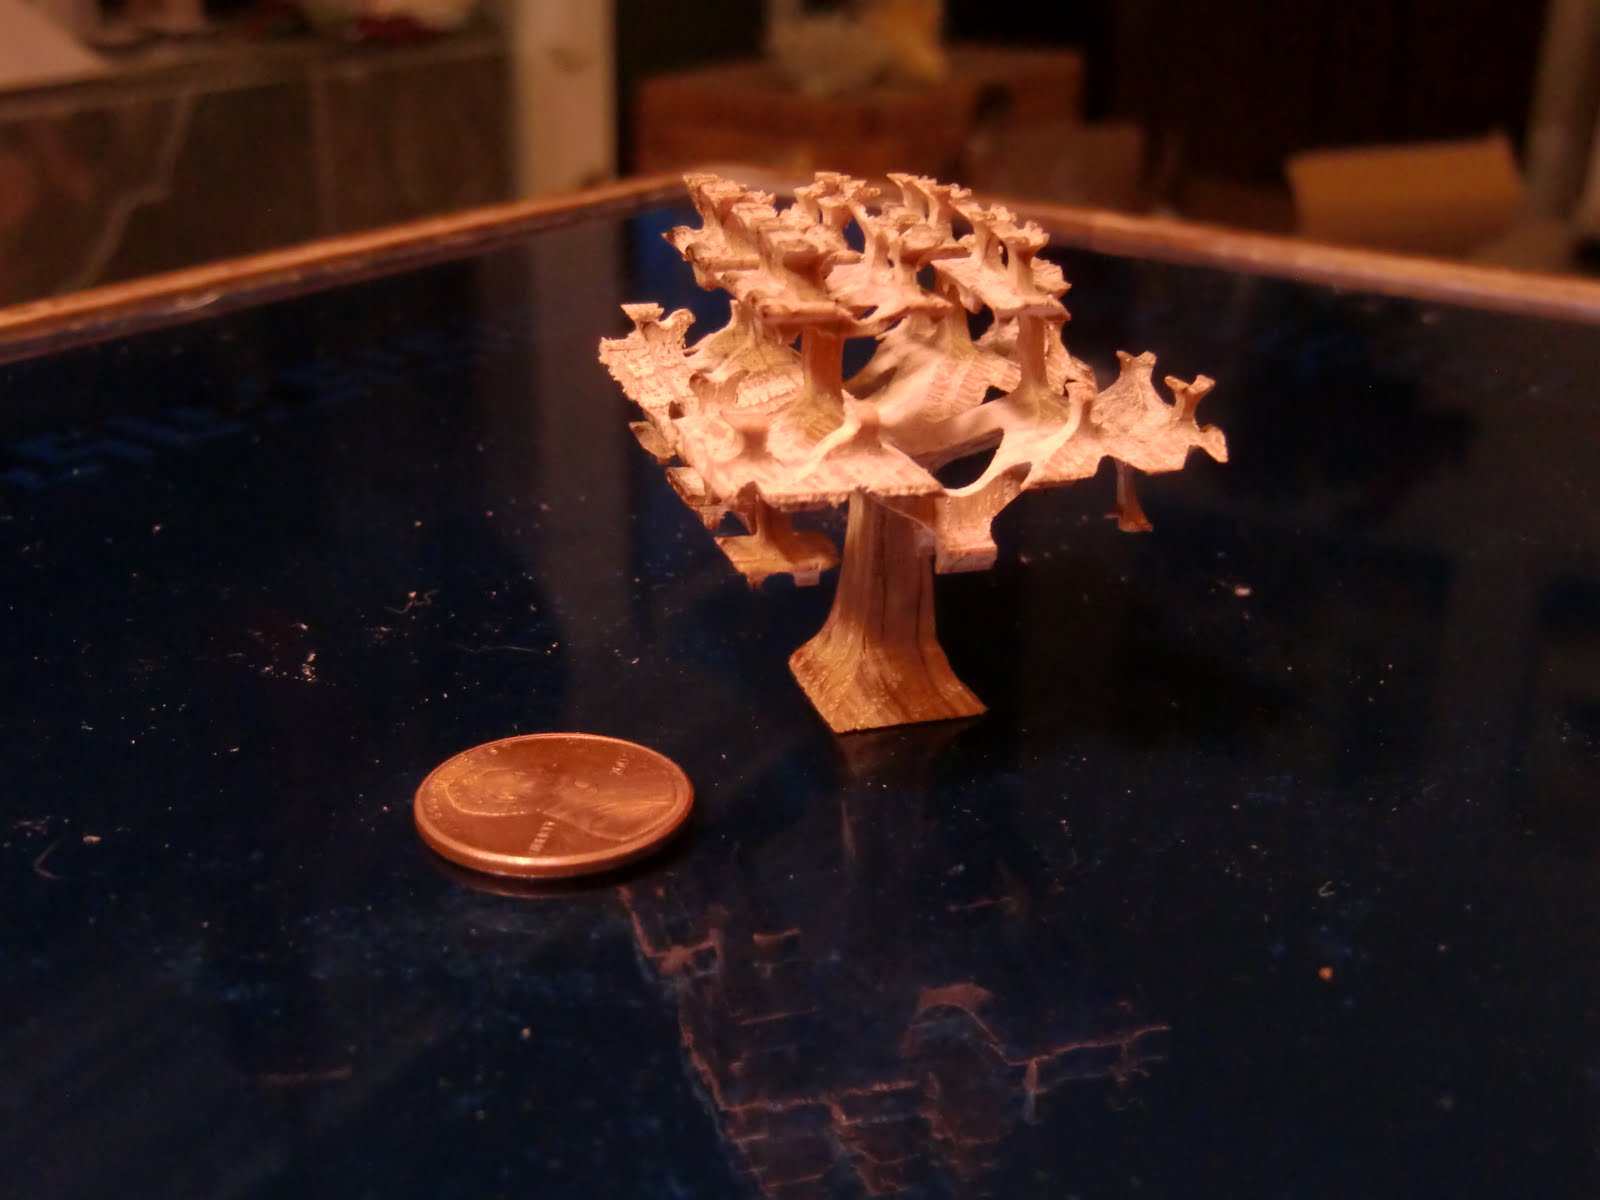
Here's one made by cutting a square made out of quadratic type 1 Koch iteration 3 curves on 3 faces:
Here's another one made by cutting out nested circles on 2 faces and an x on the top. Note if you don't cut out the x on top you will be left with a very different object:

Here's a video of the object so you can see what it looks like when rotating:
A few non fractal objects:
On each of two faces this is five circles inside another circle. Small circles were made using a drill press.
Octagons on 3 faces:
Squares on three faces connected at their vertices instead of their faces (That would give a cube of course.) Here you get a rhombic dodecahedron which makes a fair twelve sided die.
This one is from a template. From one side it is a knight with armor, helmet, and sword:
From the other it is a griffin:
Here's a video showing it rotate:
Now for some tips.
1. You must make sure you're stock is square and when you cut them off you are making cubes with as flat of faces as possible.
2. Use clear tape (I use packing tape) to cover the wood. This makes the cutting easier by lubricating the blade as it cuts through the tape. (I'm really not sure how this works...but it does make a big difference)
3. Just glue the diagrams up to the material to be cut using a spray adhesive.
4. Cut along the lines...always doing any inside cuts first. After each cut is finished, you must put the material back and retape. This is an important step. This is what supports the piece and also what keeps the piece square to the table.
5. After every line is cut on all sides, remove all tape and carefully deconstruct. Somewhere in the middle is the object you want! :)
To create the diagrams, I've been finding images using either google image search or wikipedia. To make good geometrical diagrams, I also use geogebra which is a pretty cool free piece of software. I scale everything in photoshop.
Frabjous
I've been a big fan of George Hart's geometric sculptures for a while now and so a few weeks back I decided I would build his Frabjous (title based off the nonsense poem The Jaberwocky by Lewis Carol) since he actually gives the template for it on his site. He also says that it's a tricky puzzle...which I probably should have listened to. All along I wanted to build it out of wood...but I knew that it was going to take quite a bit of time and effort so I started out building a model of it out of paper. This was a bad, bad idea because the paper bends and it is really hard to see the shape as you are weaving everything together. I wasted several hours over a multi-week period before I re-attempted it in wood. I eventually built it out of 1/8 inch thick Baltic Birch plywood which I cut using my scroll saw and "stained" using permanent markers which does allow the grain to show through. The following pictures show some of the process and the results.
In particular I'm proud of the tab connection system I came up with that really helped keep the thing together while maintaining flexibility. I also like the pointillism style of decorating them, though this took longer than I thought to do. Liz says that it looks like fireworks as a result.
After looking at my pictures you really should check out some of George Hart's other sculptures. http://www.georgehart.com/sculpture/sculpture.html
And if you want to give it a try here is a link to the paper where he shows the template. http://www.georgehart.com/frabjous/frabjous.pdf
The finished product.
Another angle
Close up
The individual units that must be woven through each other. There are 30 of these.
The signature. Note it is claimed to be a copy.
Close up of a completed piece. Note the tabs which allow everything to go together nicely. Since they are made of card stock they are pretty stiff but do allow some flexibility which really helps when weaving it together.
Putting it together...the start.
Showing everything is made up of standard pentagrams.
Now it's getting complicated! There's only one correct way to build this so that all the pieces remain planar!
Copernican Orrery (Gears for Jupiter and Saturn)
Last night I finished up the last of the gears. There is still a lot more work to be done though, including making wooden spacers and the entire frame. And the hard part is going to be putting it all together just right so that it actually runs.
The driving gear for Jupiter has 83 teeth while the gear connected to the planet has only 7 teeth. This would make a year on Jupiter have 83/7*365.2425= 4330.73 days. The actual orbital period is 4331.57 days which gives an amazing level of accuracy. It's only off by 1 part in 5200. Saturn's driving gear has 147 teeth and was a pain to cut! The gear connected to Saturn will have only 5 teeth. This makes a year on Saturn have 147/5*365.2425= 10738.12 days. The actual orbital period is 10759. This is the least accurate of all of the planets on this Orrery. It still is only off by about 1 part in 500.
Jupiter's Gears
Showing Jupiter's gears mesh.
Saturn's driving gear. Note: Since the 5 tooth gear for Saturn is so small it is actually made in a different fashion by using small wooden rods which I have not done yet.
The finished gear stack from above.
The finished gear stack from the side.
Close up of the gears.
Another close up of the gears.
Copernican Planetary Orrery (Gears for Earth and Mars)
I spent a little bit of time on the wooden orrery today. Click here for the original post and description. Two more sets of Gears are done (Earth and Mars). Earth's gears are one to one. Each time the driving gear turns once, the planet will spin once. Also everything in this orrery is based on Earth so in some sense there is no error in this gearing. For Mars we have the first of the reduction gears. The gear driving Mars is smaller than the gear Mars is on so Mars spins around slower than the gear driving it. The driving gear has 25 teeth and the gear Mars is attached to has 47 teeth. This gives a year length of 47/25*365.2425 =686.66 days. Mars' orbital period is actually 686.98 days. So there is an error of about 1 part in 2200 (about the same as Mercury and about double that of Venus.) The gear stack is starting to look pretty impressive.
Earth's gears
Top view of gear stack (Mercury - Earth)
Side view of gear stack (Mercury - Earth)
Mars' gears
Top view of gear stack (Mercury - Mars)
Side view of gear stack (Mercury - Mars)
Close ups of gear stack (Mercury - Mars)

Popular Posts
-
 This post is going to be on 3D fractals cut on a scroll saw. (Thus the title of course.) As some of you know, I'm somewhat addicted to...
 -
 I've been a big fan of M.C. Escher's Art since I was a little kid. His impossible figures drawings are mindblowing and his tesselat...
 -
 It's the middle of April and this next week all students at University Preparatory School , where I teach, will be taking the California...
 -
 I've always been interested in maps and different projections and how they make such a difference in the way the world looks when a sphe...
 -
 I ran across an article a couple of months ago talking about an artist making cityscapes using staples to build the buildings. The cities w...
 -
 A couple of weeks ago, I suddenly had the idea to make the Platonic solid s out of pennies. I'd made them before out of paper in severa...
 -
 I've been a big fan of George Hart's geometric sculptures for a while now and so a few weeks back I decided I would build his Frabjo...
 -
 I finally finished a papercraft project I've been working on for about a month. It's made up of parts of 29 sheets of cardstock. I...
 -
 This post combines two of my hobbies, making things out of paper (papercrafting) and exploring and building fractals. For those of you that...
 -
 I spent a little bit of time on the wooden orrery today. Click here for the original post and description . Two more sets of Gears are done...
Subscribe To


 Posts
All Comments
Posts
All Comments