Frabjous
I've been a big fan of George Hart's geometric sculptures for a while now and so a few weeks back I decided I would build his Frabjous (title based off the nonsense poem The Jaberwocky by Lewis Carol) since he actually gives the template for it on his site. He also says that it's a tricky puzzle...which I probably should have listened to. All along I wanted to build it out of wood...but I knew that it was going to take quite a bit of time and effort so I started out building a model of it out of paper. This was a bad, bad idea because the paper bends and it is really hard to see the shape as you are weaving everything together. I wasted several hours over a multi-week period before I re-attempted it in wood. I eventually built it out of 1/8 inch thick Baltic Birch plywood which I cut using my scroll saw and "stained" using permanent markers which does allow the grain to show through. The following pictures show some of the process and the results.
In particular I'm proud of the tab connection system I came up with that really helped keep the thing together while maintaining flexibility. I also like the pointillism style of decorating them, though this took longer than I thought to do. Liz says that it looks like fireworks as a result.
After looking at my pictures you really should check out some of George Hart's other sculptures. http://www.georgehart.com/sculpture/sculpture.html
And if you want to give it a try here is a link to the paper where he shows the template. http://www.georgehart.com/frabjous/frabjous.pdf
The finished product.
Another angle
Close up
The individual units that must be woven through each other. There are 30 of these.
The signature. Note it is claimed to be a copy.
Close up of a completed piece. Note the tabs which allow everything to go together nicely. Since they are made of card stock they are pretty stiff but do allow some flexibility which really helps when weaving it together.
Putting it together...the start.
Showing everything is made up of standard pentagrams.
Now it's getting complicated! There's only one correct way to build this so that all the pieces remain planar!
Polypolyhedra
A year and a half ago at Christmas time I started making a series of modular origami structures that are known as polypolyhedra since they are made up of an "orderly tangle" of other polygons or polyhedra. They are only held together by frictional locks (ok, ok, I did use tape a couple of times...but that's just because so many people have handled them!) and are all made up of a single type of modular origami unit. Since it was Christmas time, I decided to build them out of large (12 inch) metallic cardstock. Normally, these are hanging up in my classroom, but I took them down to use my classroom for a location to film part of a webvideo series that I'm working on with my brother, a cousin and a bunch of my students.
To learn more about these geometric figures check out: http://www.langorigami.com/science/polypolyhedra/polypolyhedra.php4 and while you're at it check out more of Dr. Robert Lang's Origami. By the way he's a Ph.D. Physicist!
The five intersecting tetrahedra is a fun little puzzle to solve. There are probably millions of ways to put the object together but only a few that work without causing the paper to bend a lot! I think that I could probably build and assemble it in a couple of hours now...but the first time I did it, it probably took about 10!
4 intersecting triangles

6 intersecting squares

6 intersecting pentagons

five intersecting tetrahedra


All together now
Staple Sears Tower Skyscraper
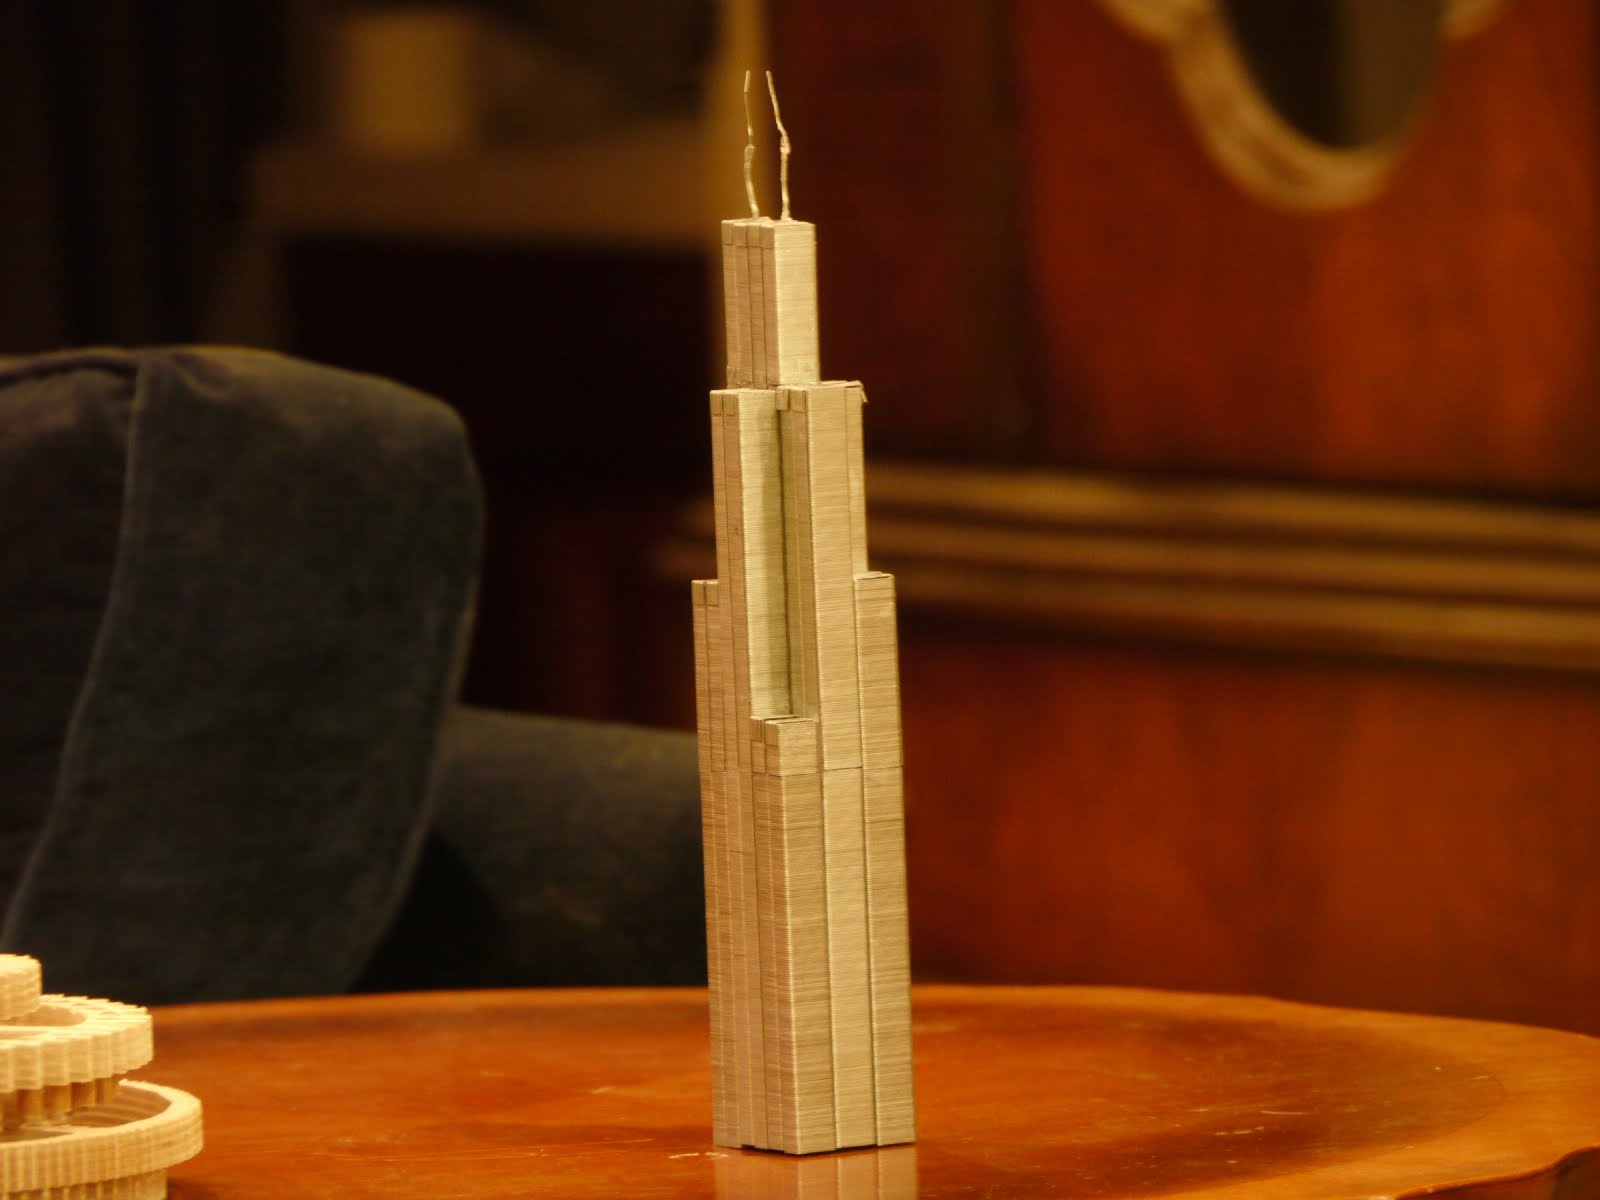
I ran across an article a couple of months ago talking about an artist making cityscapes using staples to build the buildings. The cities were very cool looking but the buildings were just rectangular boxes. I immediately started to think of building a more interesting building and the first one to leap to mind was the Sears Tower (actually renamed the Willis Tower recently) since it is an interesting building that is built out of 9 rectangular boxes. My friend Jay has always had a fascination with the building since he was born in Chicago and so I decided to build it and give it as part of a wedding present this June (Congrats Jay)
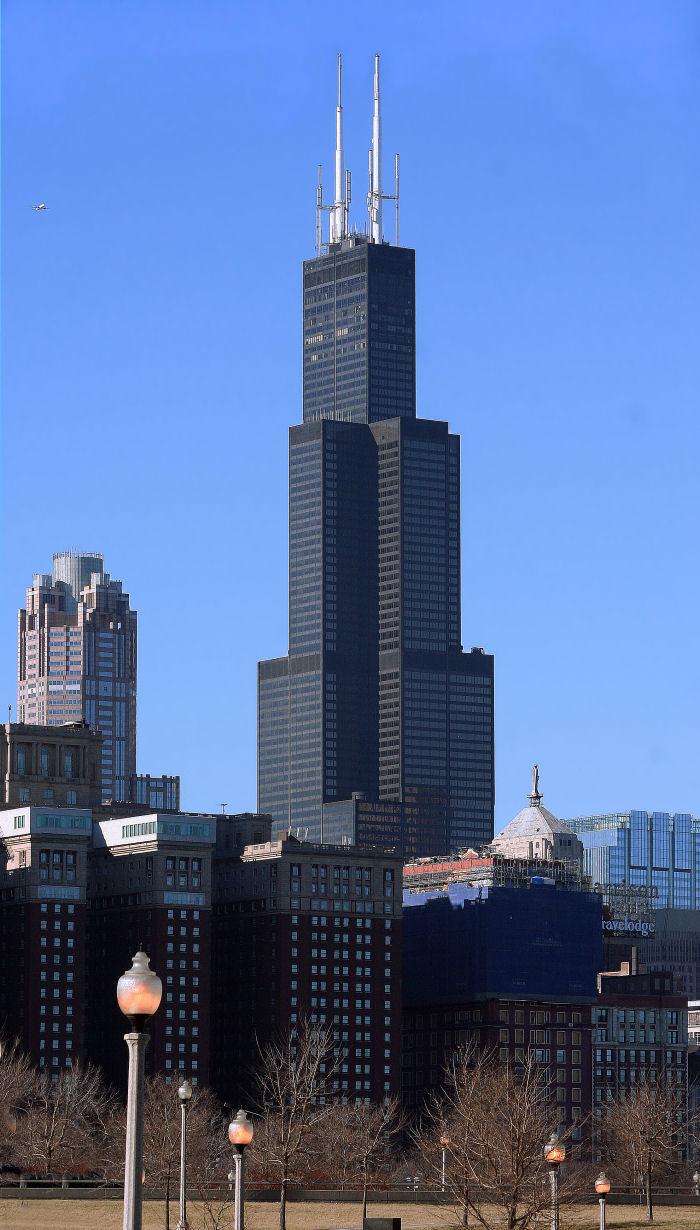
The model I built is about 12 inches tall and is really close to an accurate scale model. Each staple width represents 75 feet. The whole thing took about 15,000 staples, a bit of superglue and about 2 hours to build. It probably weighs a little under 2 pounds, perfect for a desk ornament/ paper weight. Someday, I'll have to build some other buildings out of staples, since I was very happy with how this turned out. The last picture is the real Sears (Willis) Tower.


Hood Ornaments
On a recent vacation, I ended up visiting a car museum. One of the things I ended up being really interested in was the hood ornaments.
I thought I would try to capture them portrait style as much as possible. It was a little difficult to get the right angles but here are a few that I thought were pretty good. Right now, I'm too lazy to do any cropping or any processing at all, so these are all with the cameras settings untouched.




Aerial Panoramas 2
This post is a continuation of Aerial Panoramas 1. These are more pictures taken out of plane windows. I'm going to use the same introduction to this post because I am lazy.
If the lighting is good and the window isn't too scratched up, you can take pretty good pictures out of a plane window. I'm sure someone else has done this but I've never seen images out the windows of airplanes stitched into panoramas. Here are a few that I've taken. I'll probably post up most of the others tomorrow. While planes are traveling at a few hundred mph, the distances to objects are enough that you can still take your time when snapping the pictures to stitch together. The exception to that rule is right around takeoff or landing. One of the pictures here is flying over Sacramento around sunrise and you can see that the panorama is distorted. I waited too long between pictures...
Just click on the pictures to see slightly larger versions.
Over Sacramento


On the image below the plane was low to the ground so I wasn't taking pictures fast enough.


This is over the Great Salt Lake. The reddish color is supposedly due to unicellular organisms that live in the salty water.

Popular Posts
-
 This post is going to be on 3D fractals cut on a scroll saw. (Thus the title of course.) As some of you know, I'm somewhat addicted to...
 -
 I've been a big fan of M.C. Escher's Art since I was a little kid. His impossible figures drawings are mindblowing and his tesselat...
 -
 It's the middle of April and this next week all students at University Preparatory School , where I teach, will be taking the California...
 -
 I've always been interested in maps and different projections and how they make such a difference in the way the world looks when a sphe...
 -
 I ran across an article a couple of months ago talking about an artist making cityscapes using staples to build the buildings. The cities w...
 -
 A couple of weeks ago, I suddenly had the idea to make the Platonic solid s out of pennies. I'd made them before out of paper in severa...
 -
 I've been a big fan of George Hart's geometric sculptures for a while now and so a few weeks back I decided I would build his Frabjo...
 -
 I finally finished a papercraft project I've been working on for about a month. It's made up of parts of 29 sheets of cardstock. I...
 -
 This post combines two of my hobbies, making things out of paper (papercrafting) and exploring and building fractals. For those of you that...
 -
 I spent a little bit of time on the wooden orrery today. Click here for the original post and description . Two more sets of Gears are done...
Subscribe To


 Posts
All Comments
Posts
All Comments