3D fractals cut on a scroll saw
This post is going to be on 3D fractals cut on a scroll saw. (Thus the title of course.) As some of you know, I'm somewhat addicted to making fractals, so it should be no surprise that a simple technique I learned ended up leading me to produce wooden fractals. Check out the paper craft fractals I've made here, and the worlds largest fractal made out of tortilla chips here,
To start this post, I'll put a couple of quick picture of the types of objects you can achieve with this technique, then I'll tell the whole story of how I started making them, and give a couple of tips, ideas and diagrams for people that want to try making them.
Quick Preview:


Over winter break, I've spent a lot of time using my scroll saw. I started out making Christmas Ornaments; I actually cut 10 different kinds of fretwork ornaments that I found diagrams for on the internet or in various scroll saw books and gave them as presents to all of my family. I probably made about 50 wooden ornaments in total by cutting up to 6 copies at a time.
Here's a small sample of the ornaments I made:
I also decided to try compound cutting 3 dimensional ornaments. This is standard scroll saw technique in which you cut on 2 different faces in order to produce a result. Here are pictures of the two that I made.
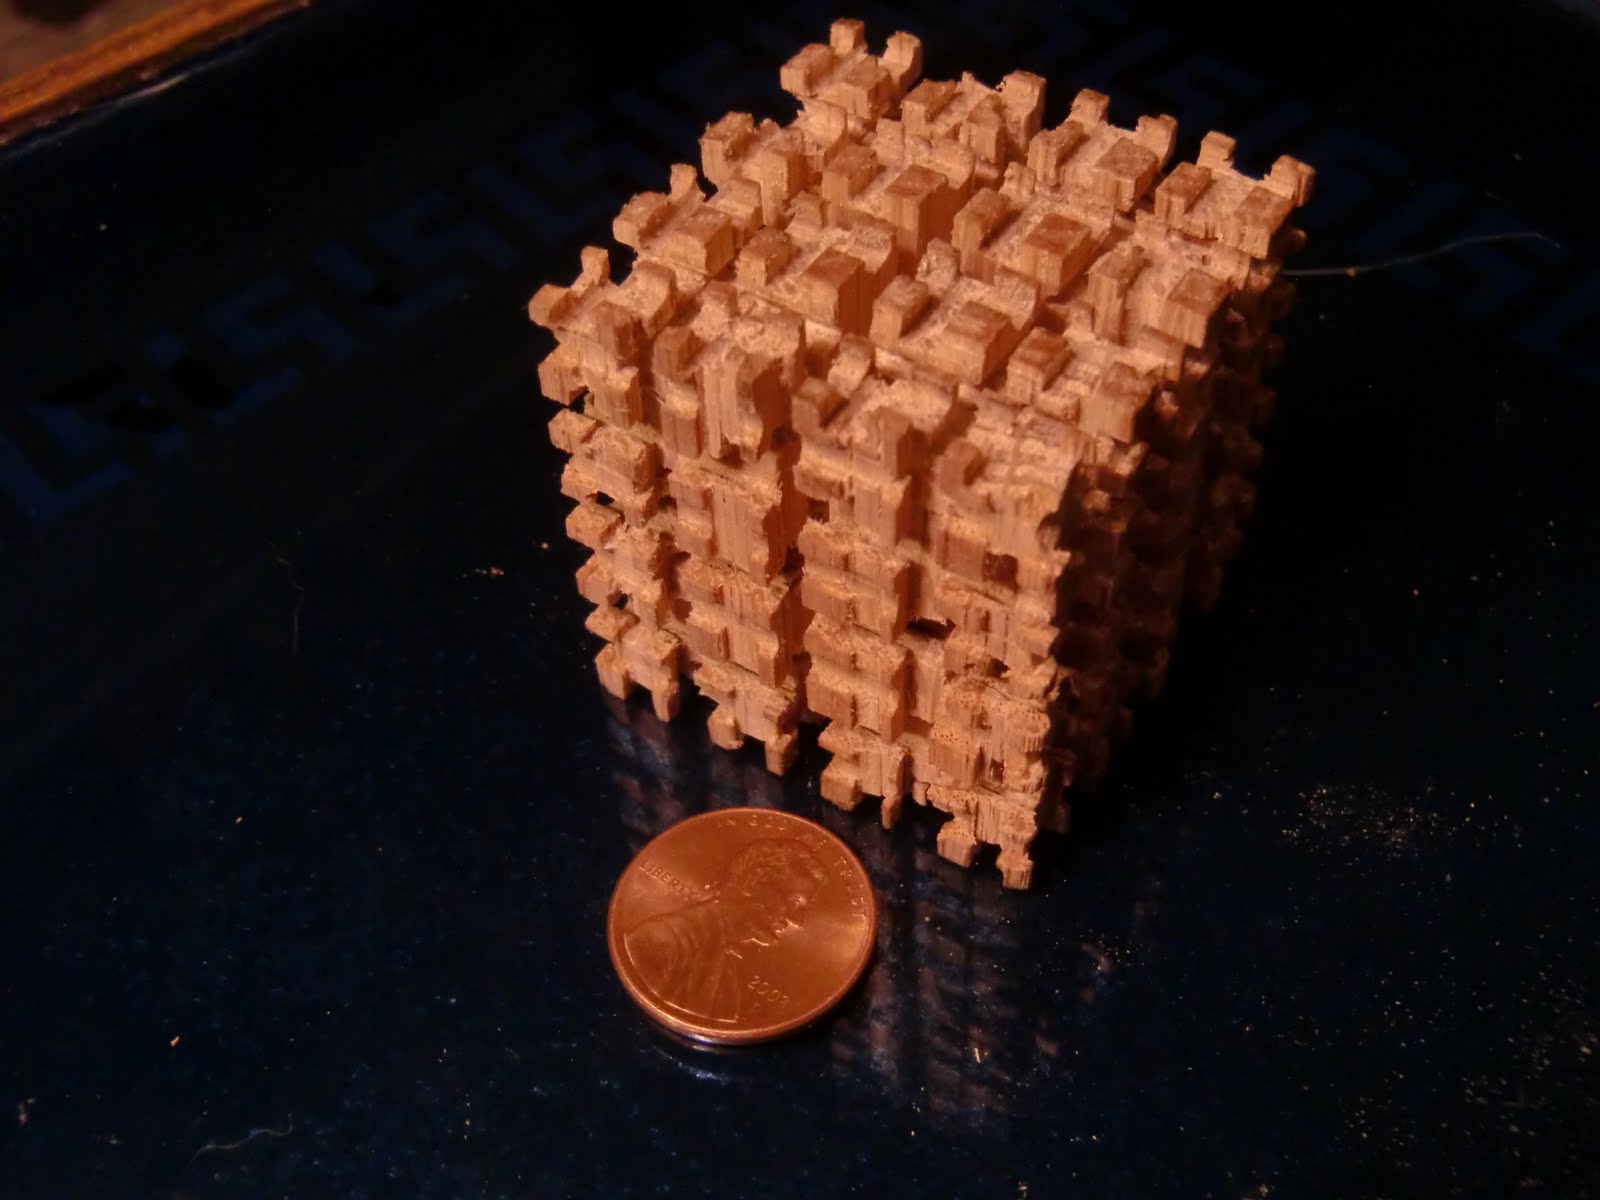
After cutting these compound ornaments out, I realized something. I was cutting out 4 different curves by only cutting two curves on each face. 2x2=4 of course... so why not try cutting 3 different curves on each face. This would give 3x3=9 curves. Hmmm... seems like exponential growth that could lead to an efficient method to produce fractal objects. So I started out trying to see what would happen if I cut out T-Square fractals on each of the 3 faces of a 1.5 inch cube that I made by taking a 2x2x48 Oak turning square (remember 2 inches is only 1.5 inches when you're buying most lumber). First I used the 2nd iteration of the T-Square which ends up getting you a cube, with 8 cubes at each corner, and then 7 cubes at each corner of those cubes for a total of 56 little cubes. This would take forever to carve by hand but probably less than an hour to cut using this scroll saw technique. I made the template by taking images from Wikipedia.
Here's a picture:
This one is looking at it so you only see one face letting you see what the diagram to cut it from would look like:
And here is the diagram it was cut from (You would fold along the red lines after scaling this to 3 inches by 3 inches) :
I needed to try to see if I could do iteration 3. This would mean that there would be 7 little cubes on each of the 56 small cubes from iteration 2 for a total of 392 really tiny cubes, some of which are fairly deep down in the structure. I failed on my first try, but succeeded on my second.
Here it is:
From there I decided to try a few ideas.
Here's a 3rd iteration Sierpinski square pyramid made by cutting 3rd iteration Sierpinski's triangles on 2 faces:
Here's a 2nd iteration Moore curve made by cutting 3 different faces using cross sections found from looking at pictures of a 3D Moore curve on Wolfram's mathworld site. Note to make this one you still have to cut a few pieces (10) by hand. But you get over 90% of the work done in an hour with the scroll saw. This is a really cool object. It is one continuous path connecting up the entire cube; a space filling curve.
Here's a fractal I made by making my own fractal tree and cutting it on two faces. Here it is looking at one face:
Now seeing it from a 45 degree angle: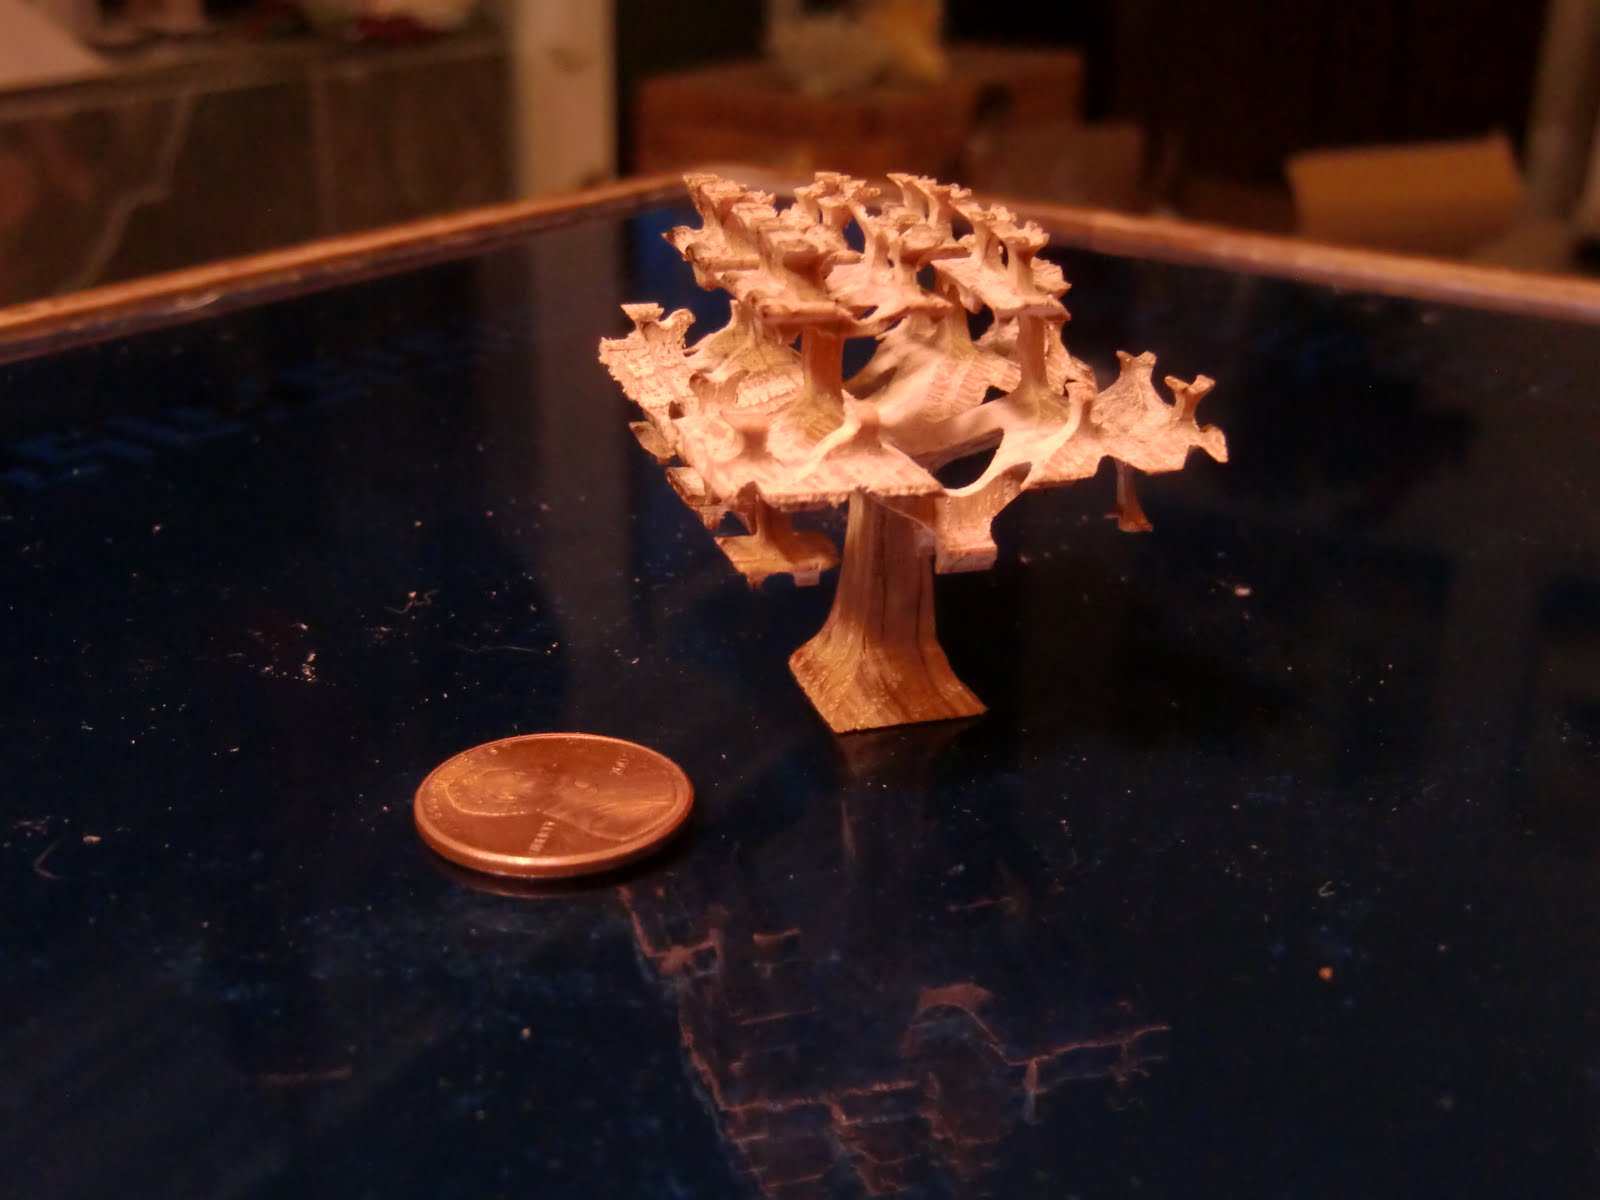
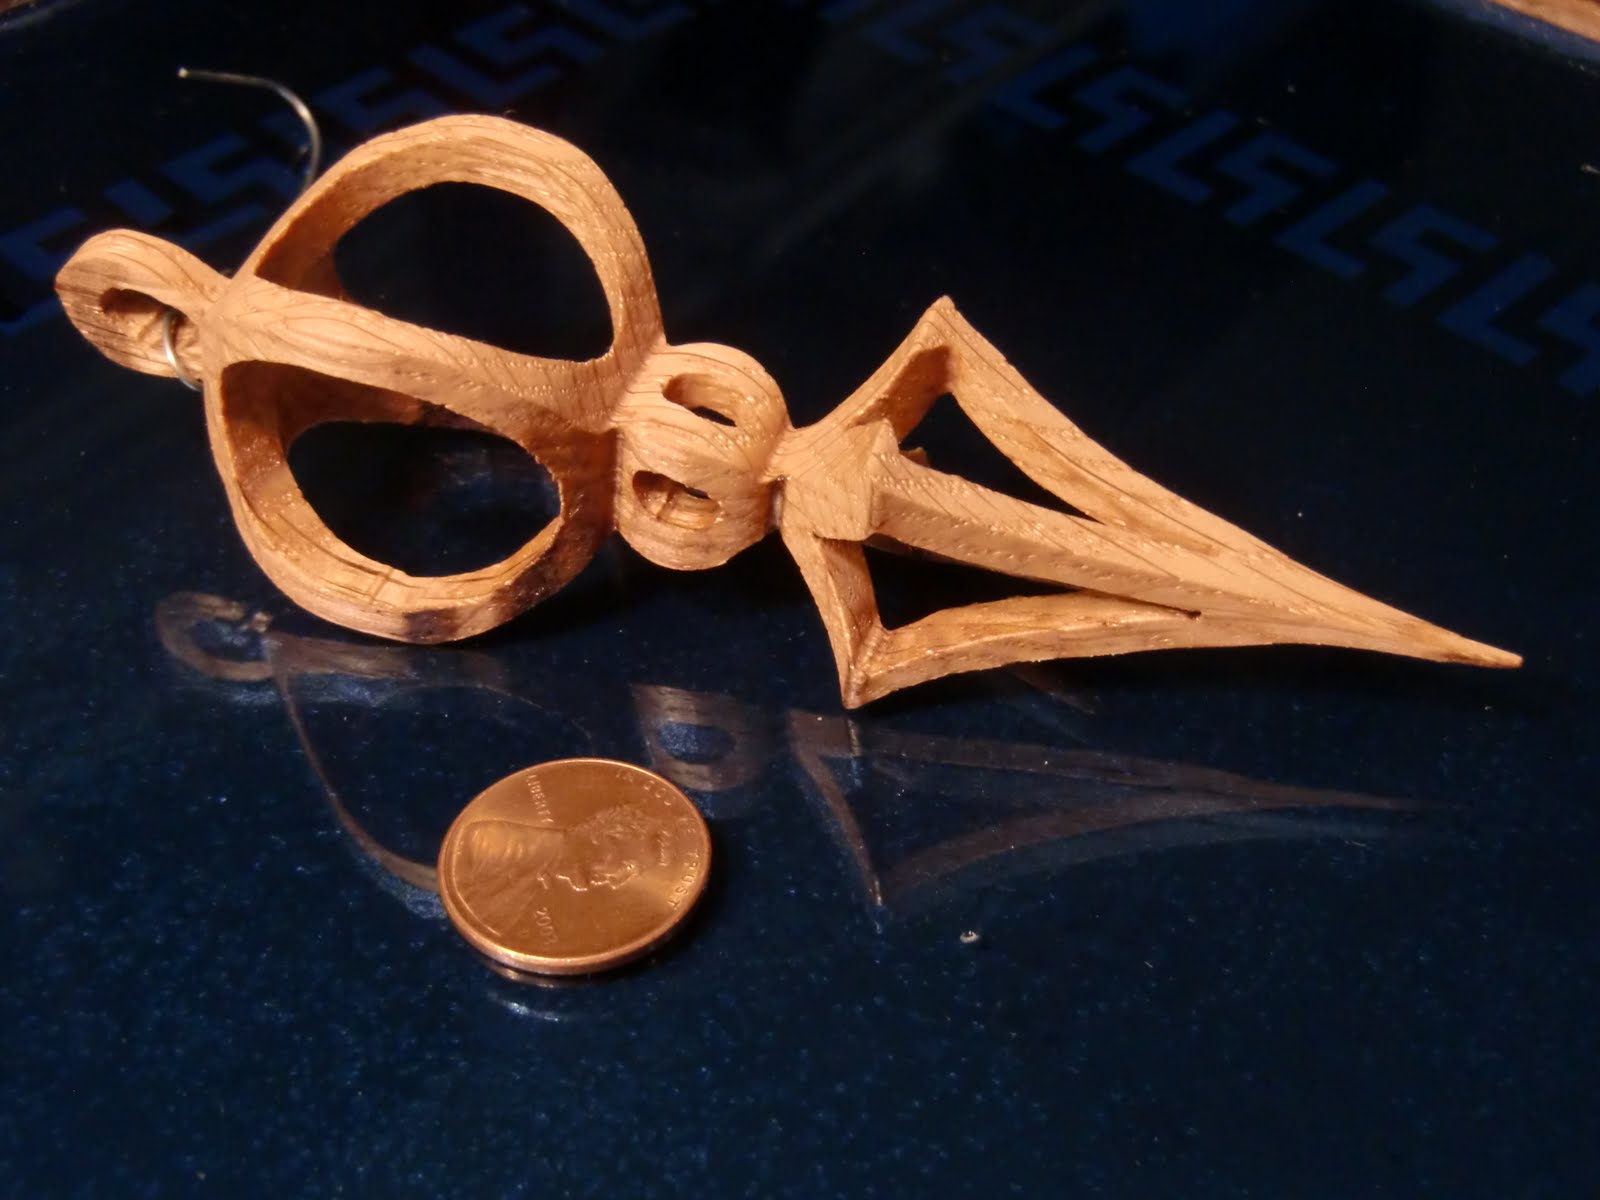
Here's one made by cutting a square made out of quadratic type 1 Koch iteration 3 curves on 3 faces:
Here's another one made by cutting out nested circles on 2 faces and an x on the top. Note if you don't cut out the x on top you will be left with a very different object:

Here's a video of the object so you can see what it looks like when rotating:
A few non fractal objects:
On each of two faces this is five circles inside another circle. Small circles were made using a drill press.
Octagons on 3 faces:
Squares on three faces connected at their vertices instead of their faces (That would give a cube of course.) Here you get a rhombic dodecahedron which makes a fair twelve sided die.
This one is from a template. From one side it is a knight with armor, helmet, and sword:
From the other it is a griffin:
Here's a video showing it rotate:
Now for some tips.
1. You must make sure you're stock is square and when you cut them off you are making cubes with as flat of faces as possible.
2. Use clear tape (I use packing tape) to cover the wood. This makes the cutting easier by lubricating the blade as it cuts through the tape. (I'm really not sure how this works...but it does make a big difference)
3. Just glue the diagrams up to the material to be cut using a spray adhesive.
4. Cut along the lines...always doing any inside cuts first. After each cut is finished, you must put the material back and retape. This is an important step. This is what supports the piece and also what keeps the piece square to the table.
5. After every line is cut on all sides, remove all tape and carefully deconstruct. Somewhere in the middle is the object you want! :)
To create the diagrams, I've been finding images using either google image search or wikipedia. To make good geometrical diagrams, I also use geogebra which is a pretty cool free piece of software. I scale everything in photoshop.
Popular Posts
-
 This post is going to be on 3D fractals cut on a scroll saw. (Thus the title of course.) As some of you know, I'm somewhat addicted to...
 -
 I've been a big fan of M.C. Escher's Art since I was a little kid. His impossible figures drawings are mindblowing and his tesselat...
 -
 It's the middle of April and this next week all students at University Preparatory School , where I teach, will be taking the California...
 -
 I've always been interested in maps and different projections and how they make such a difference in the way the world looks when a sphe...
 -
 I ran across an article a couple of months ago talking about an artist making cityscapes using staples to build the buildings. The cities w...
 -
 A couple of weeks ago, I suddenly had the idea to make the Platonic solid s out of pennies. I'd made them before out of paper in severa...
 -
 I've been a big fan of George Hart's geometric sculptures for a while now and so a few weeks back I decided I would build his Frabjo...
 -
 This post combines two of my hobbies, making things out of paper (papercrafting) and exploring and building fractals. For those of you that...
 -
 I finally finished a papercraft project I've been working on for about a month. It's made up of parts of 29 sheets of cardstock. I...
 -
 I spent a little bit of time on the wooden orrery today. Click here for the original post and description . Two more sets of Gears are done...


11 comments:
Looks very interesting will definitely try it thanks
Where can I get the patterns for your ornaments?
Sir, would it be possible to purchase the 2 patterns for the compound Christmas Ornaments? They are both very interesting and I would love to try them. I have never seen anything like that. Please and thank you. Email me at. Bear1434@icloud.com
Thanks, Chip
Sir, would it be possible to purchase the 2 patterns for the compound Christmas Ornaments? They are both very interesting and I would love to try them. I have never seen anything like that. Please and thank you. Email me at. barbii0@wp.pl
Please...patterns for the christmas ornaments. Thank you. From Uruguay S.América
Email uru_gaucho@hotmail.com
Same questions as others, where can I get the patterns for the compound Christmas ornaments?
I have tried and tried to do a compound cut...I know it can be done...I’ve seen it done...I just can’t do it...my scroll saw refuses to cooperate...refuses to cut...any advice would be helpful...
Look at the type of wood you are using. If it is soft wood a scroll saw will have little problems with cutting small pieces of wood up to 2 inches thick. Hardwood they will have a harder time with. And you should look into what type of blade you need for the type of cutting you need to make. Reverse blades are great for cleaning out sawdust for example, but they tend to lift up the project you are working on. Skiptooth blades are great for 3D cutting. They have less lifting problems than reverse blades. You also have to take into account the size of the blade you need. With Olsen brand blades, for example, you might need #7 or a #5 Skiptooth blade. A lot of people recommend using a #5 blade though. #7 blades will rip the wood a bit more than the #5 blades. But if the pattern you are using calls for a specific blade size use what is recommended. You should also take into account that scroll saws are not very good at cutting straight cuts and tend to wander around. If you want straight cuts only a bandsaw might be better for your needs. But remember that bandsaws make very rough cuts and a lot of sanding might be necessary to make the finish smooth. But scroll saws do make finer cuts and require a bit less sanding. But there are some woods like basswood that are quite soft and may require you to do more sanding than with other woods used with scroll saws. But using pine (not southern pine) or birch wood is good too. Pine does not hold details well though. So be aware of that. Birch is pretty good for scroll saws though. Do not use balsa wood though. Balsa wood will be destroyed by scroll saws. It a very soft wood. But go slowly and do not push too hard with your scroll saw. You should have a better time cutting in 3D with it. I would also suggest you get a good book on basic scroll saw usage with wood. Might be helpful too.
What an awe-inspiring display of creativity and precision! The intricate designs crafted using slitting saws on this blog are simply mesmerizing. Truly a testament to the artistry of woodworking.
This was great to read, thank you
Post a Comment